Wondering how to take full advantage of the Kontentino Starter plan? Whether you have already decided or you’re still thinking about it, here are all the essential information, tips and tricks on how to get the most out of it!
Kick-start your Kontentino journey:
Learn which Kontentino features will become your absolute must-haves and time savers!
1.Calendar + content plans
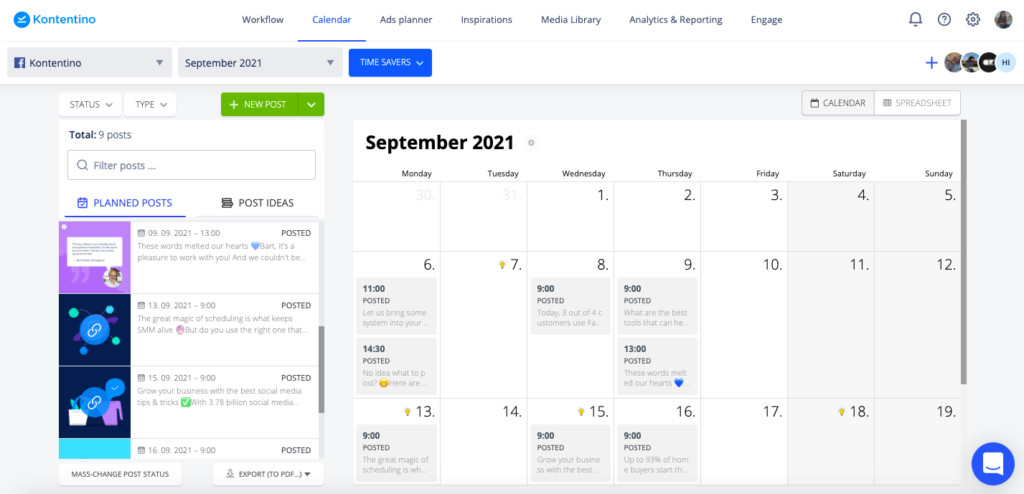
Let’s start our tour on the Calendar. Here you can create and plan your social media posts. First, don’t forget to select a profile where the post should be exported. If you haven’t added any profiles yet, select the “New Social Media Profile” option and follow the steps in Kontentino.
If you would like to see multiple profiles in one Calendar, you can create a profile group to have a better overview of your content.
You may be asking about content plans. Imagine them as folders for your posts. We usually recommend creating them monthly, so you can quickly jump from one month to another and keep your content organized.
Now you are ready to start planning!
2. Post creation
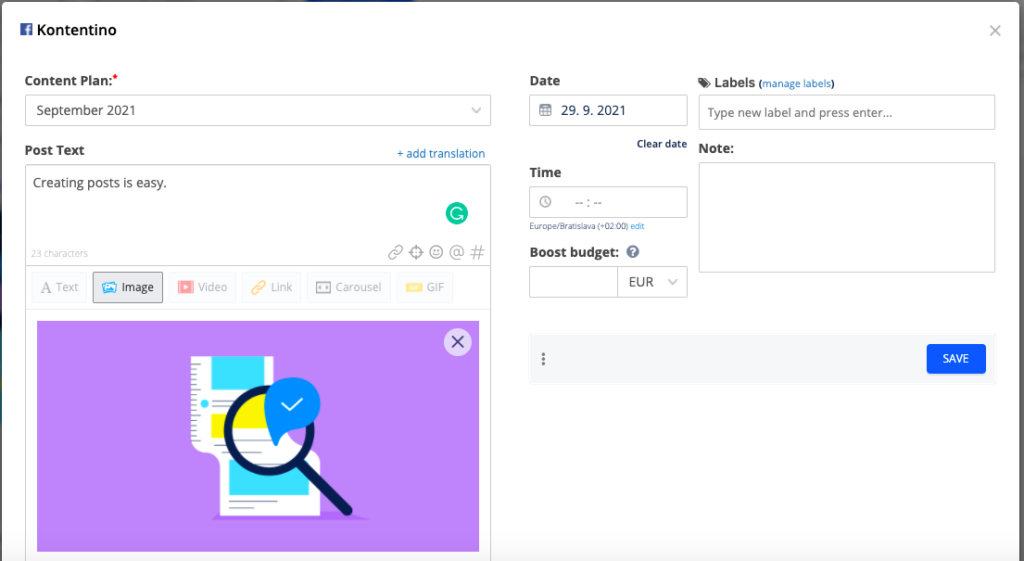
To create a post, click either directly to the Calendar or a “new post” button. Decide what post format you would like to create, prepare copy, visuals, set date and time and save the post. Now, you can see what your post will actually look like when published. For playing with the result, you have the “Edit” button.
Once your post is ready to be sent for approval, click the green button “send for an approval“. You can select internal or client approval and the person that needs to approve the post. Once they do any action (approve or ask for rework), you will be notified.
Plan the finished posts by clicking the “Schedule” button.
3. Duplicating your posts
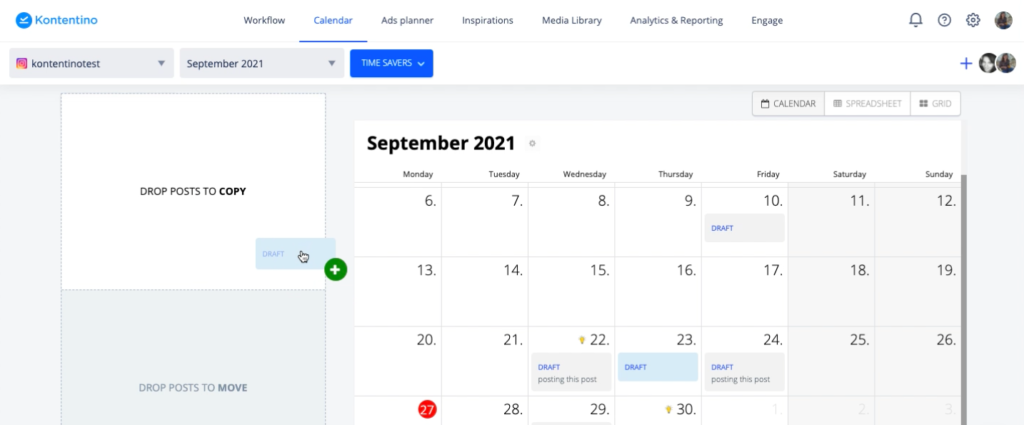
When you want to use the same post for more social media networks, use the duplication option. For example, you have a Facebook post ready and you would like to use the same post for Instagram. Drag and drop the post in Calendar to the “copy” field, select target profile and content plan, and click “duplicate“.
For more detailed information, please watch the tutorials here.
Tips and tricks:
Try these to make your life easier. Specially designed to save you time (and nerves).
Labels
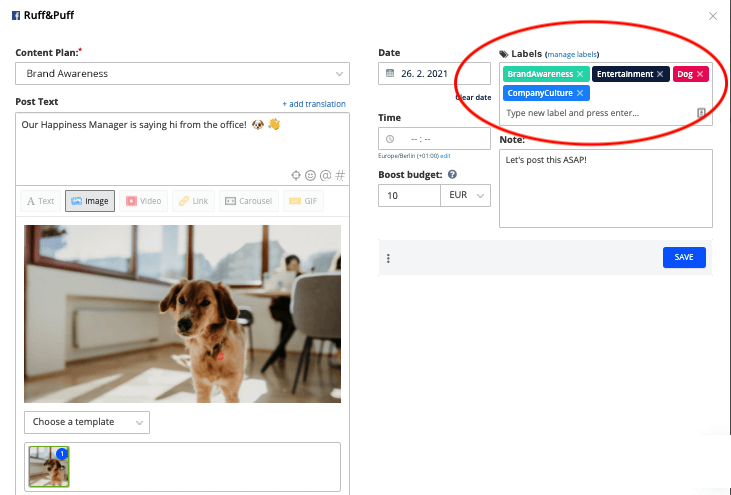
Are you running some specific campaigns or have multiple topics discussed in your social media posts? In Kontentino, you can label every post and later on filter these specific posts in your Calendar.
Instagram Grid view
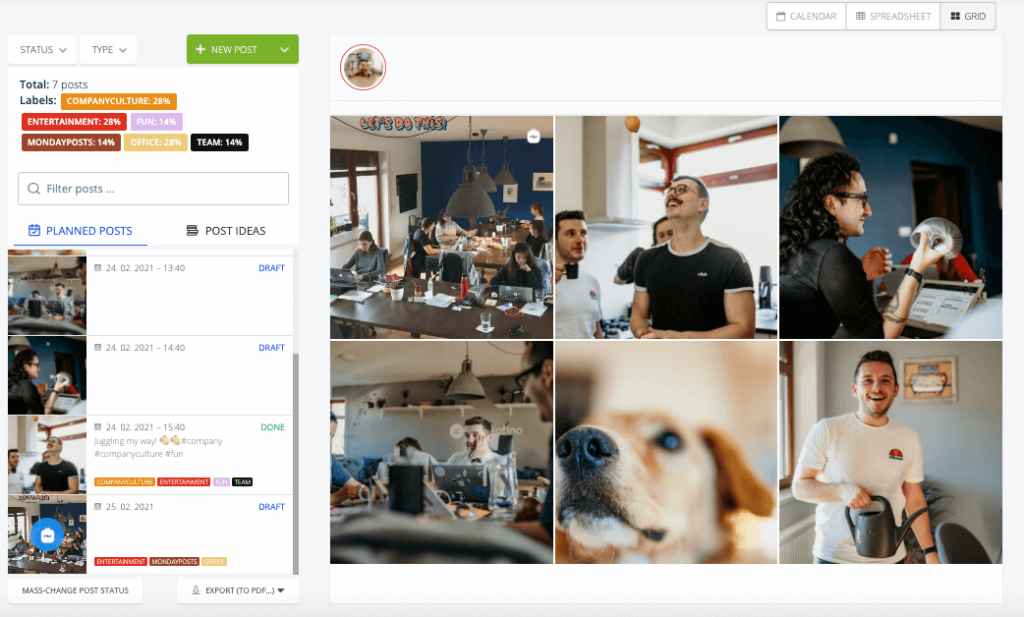
Grid view is a specific view of the calendar designed for Instagram. It allows you to see what your Instagram grid will look like once your posts are posted. This enables you to have that perfectly curated IG grid and make sure there won’t be any glitches. As a bonus, you can swap the date and time of posts by drag-and-dropping them around the grid.
Logos in pictures and image editor
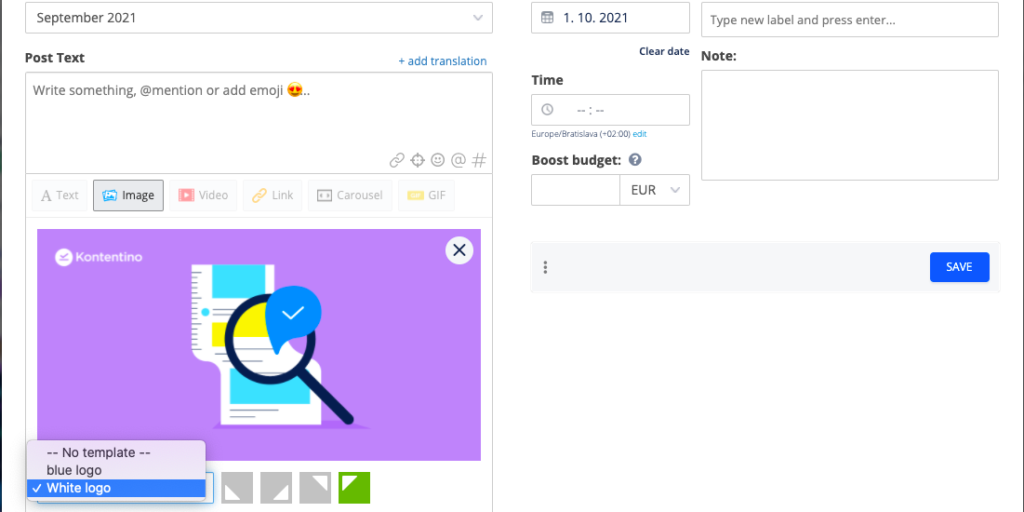
If you want to add logos or frames to your photos, you don’t need to bother your designers anymore. Firstly, upload your logos into your Kontentino profile (Settings > Profiles > Image templates). Then, when creating your post, select an option to “Add a Template” and select the logo.
Similarly, when you need to crop or resize the image in Kontentino, first upload the media to the Media Library. When creating your post, select the media library option when adding images. When you hover over the particular image in the media library, click on the pencil sign. Make the changes and save the updated file as a new image, ready to be used in your post.
Post checklist
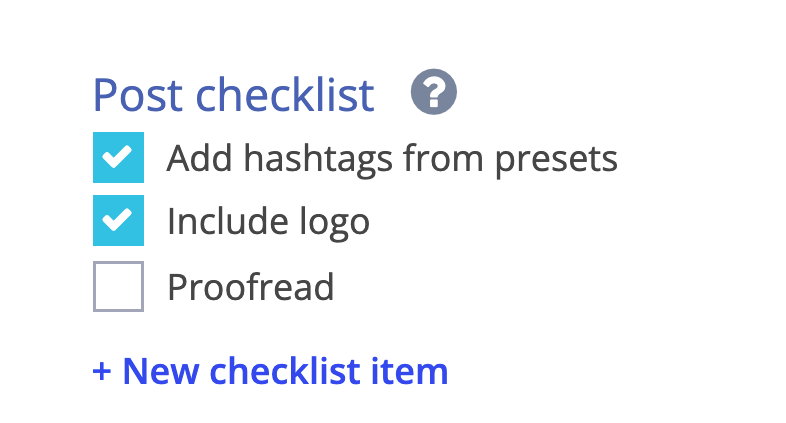
Post checklist can be helpful as a reminder of all the requirements from your client/company side. You can save yourself some time editing the posts, communicating with your supervisors or clients by basically ticking all the boxes. It can also be handy for onboarding new colleagues – so they are less stressed and feel more confident in what they’re supposed to do.
Communication section
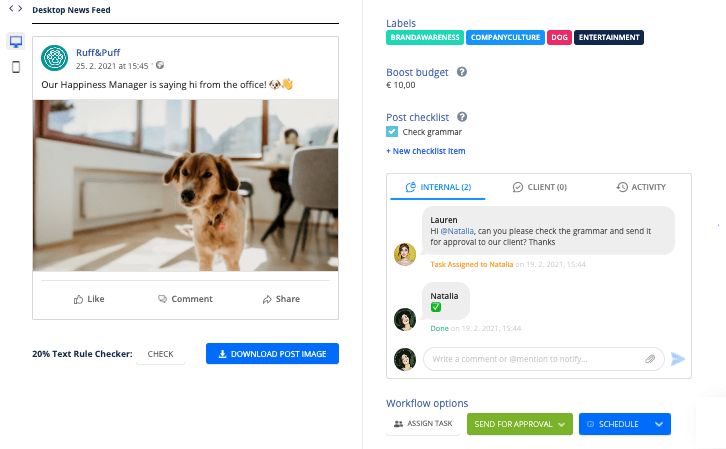
The communication section can help you streamline discussions about your posts. This means that you don’t need to search for Whatsapp or email messages anymore. The internal section stays hidden from your clients. To have a conversation with your clients, use the client part. Try tagging your colleagues or attaching files too!
Post Ideas
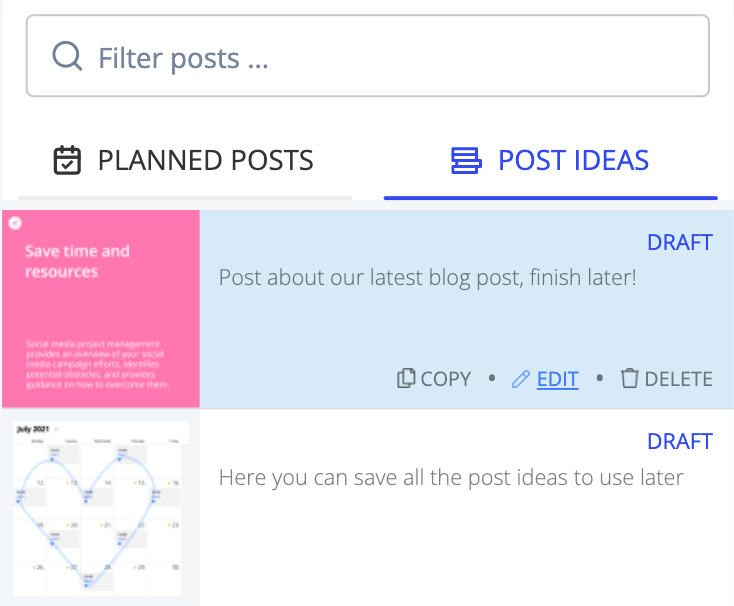
Don’t worry if you have a perfect idea for a post that doesn’t fit the current content plan. Just leave the date field blank when creating the post, and it will be saved in the “Post ideas” section, ready to be used later.
Workflow dashboard
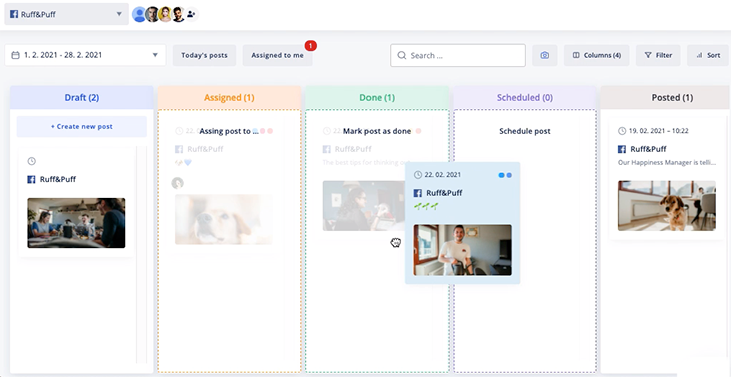
The workflow dashboard complements the Calendar and helps you to see your posts organized in columns based on their status. Customize the columns and filters, and never get lost in the Calendar again. Watch a short tutorial here.
Happy planning!
Hopefully, now you will be able to plan your post and content more effectively. If you need any advice, feel free to contact our support team in the chat.
Are you running out of capacity in your subscription? You can add a new user for free for 14 days, so you can make sure they will know how to use the software before making any additional payments. Also, if you’re wondering how to work with multiple posts at once or mark down the inspirations, these functionalities are available in the Standard and Pro plans.


